Android application dynamic analysis lab setup on windows
To perform the android application penetration testing we need a rooted android device. But it is not always safe to root our personal devices. So, I came with a solution and you to analyze the android application without an actual device. In the below, I explain the whole process of lab setup on windows.
Requirements:
- ADB to install read this
- Install Genymotion download from here (If you already have VirtualBox on your PC then go to without VirtualBox option).
- Create an account on Genymotion.
Virtual Device setup on Genymotion:
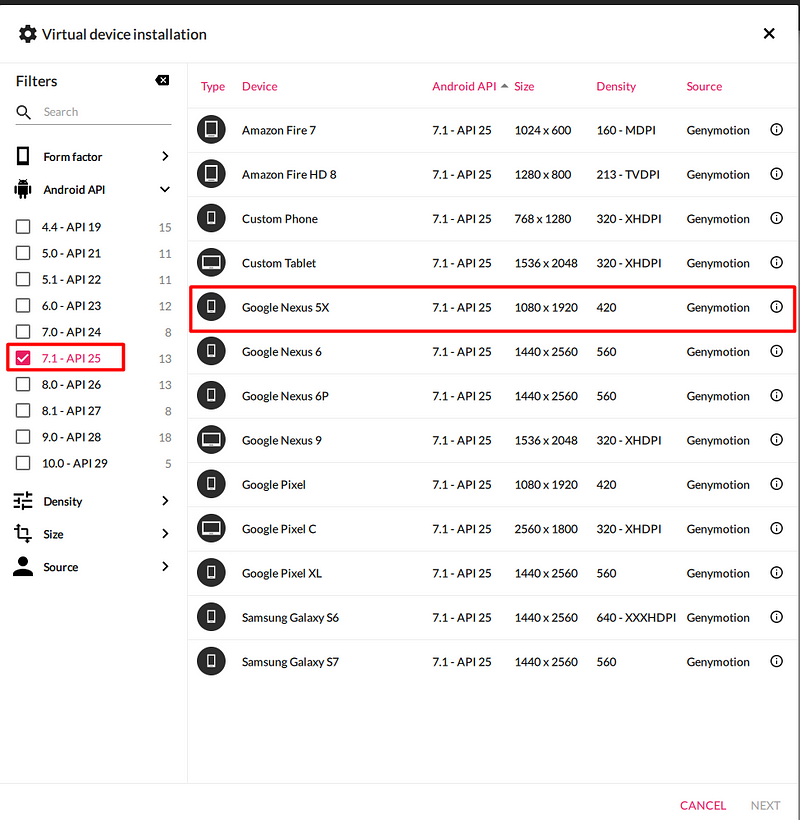
First, we have to login into the Genymotion and then we are going to creating a virtual device with android version 7.1 API level 25 configuration. Because the Inspeckage is working perfectly on this version only.
By clicking the ‘+’ icon at the top right-side we get the below window. Do select the Google Nexus 5X device under the “7.1-API 25” category and click “Next” button
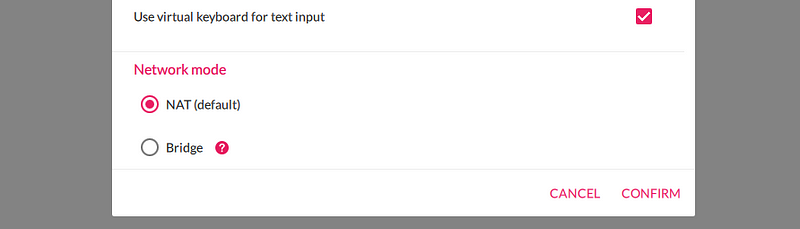
In the “Network Mode” option select the “NAT” option and then click “Install” button.
Genymotion will download the appropriate version of VD so it will take a while.

Install Xposed Framework
- Download Xposed Installer APK from here
- Download Xposed Framework zip from here
- Download Inspeckage v2.4 APK from the github repo here
Start the Virtual Device from the menu

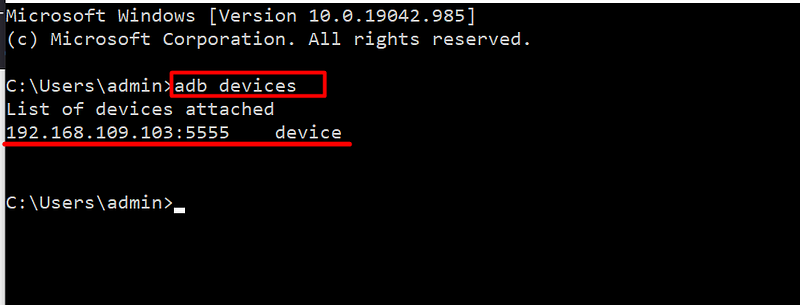
Make sure the device is online for adb
Drag and drop the Xposed framework zip file (xposed-vXX-sdkXX-x86.zip) to your virtual device display to flash the device.
Drag and drop Xposed Installer APK (XposedInstaller_*.apk). This should install and launch Xposed Installer application. At this stage, it will display that the Xposed framework is installed but disabled:

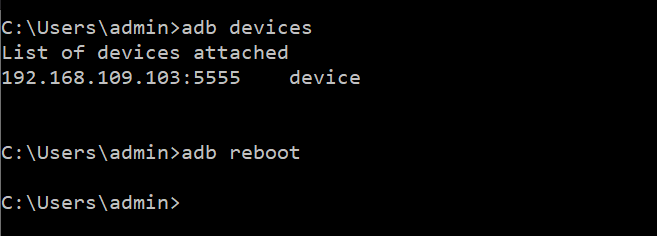
Reboot the device with adb reboot command. Do not reboot from Xposed Installer as this will freeze the device.
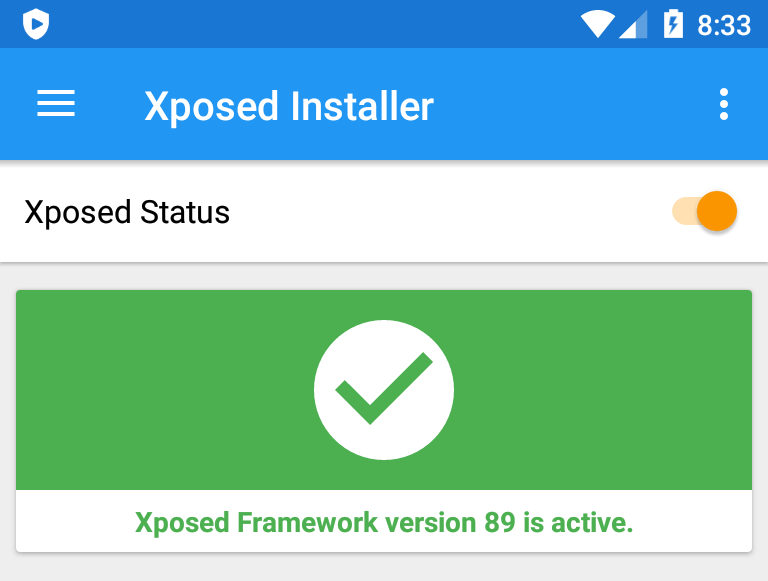
Launch Xposed installer. It should display “Xposed Framework version XX is active”
Drag and drop the Inspeackage APK (app-release.apk) to your virtual device display to install the app.
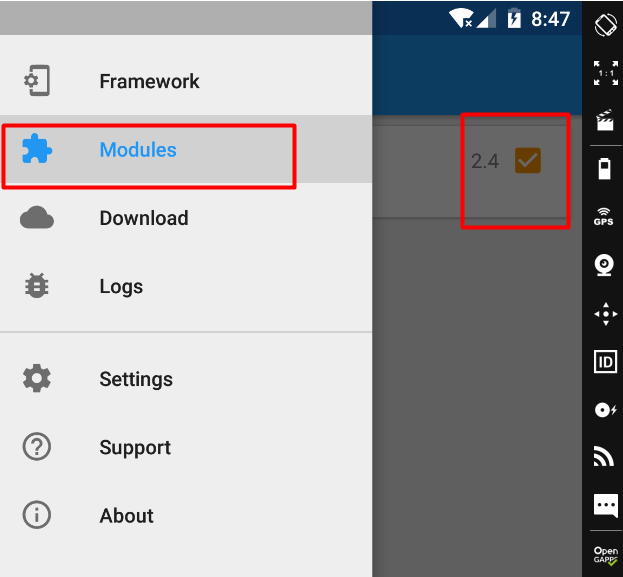
After installing, Go to Xposed Installer → Modules→ Activate the Module → reboot via adb
Dynamic Analysis with Inspeckage
After, Successful installing of Inspeckage and Xposed Installer. Now we can hook any application with Inspeackage. To do this follow the below steps
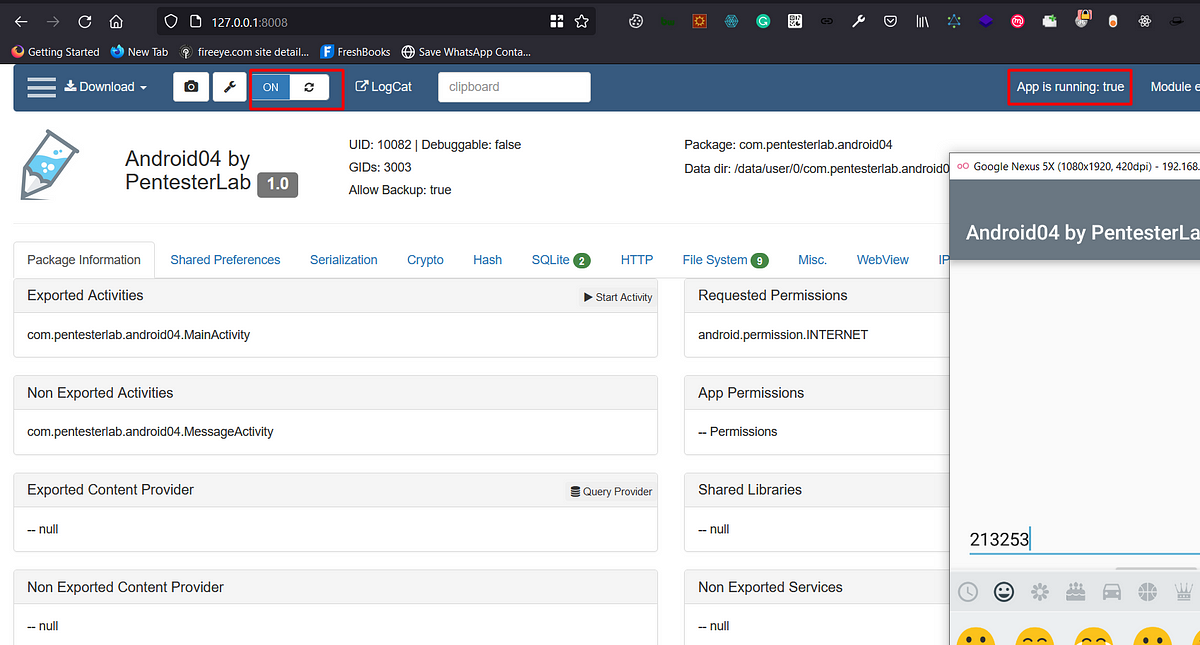
- Launch the Inspeckage Application from the application drawer
- Click on the “Choose target” text and select the target application

3. Then forward VD local-host port to main machine using adb
adb forward tcp:8008 tcp:8008

4. Now click on the “LAUNCH APP” Button and then visit [http://127.0.0.1:8008](http://127.0.0.1:8008)
5. Now click Turn On the button to Inspect the app. (make sure App is running: status should be True before you “Turn On”
Install Burp Suite CA to Android System
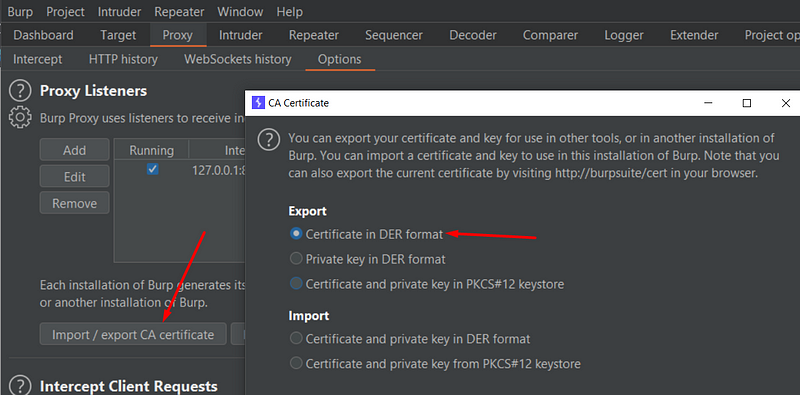
Export and convert the Burp CA The first step is to get the Burp CA in the right format. Using Burp Suite, export the CA Certificate in DER format. I saved it as cacert.der
Android wants the certificate to be in PEM format, and to have the filename equal to the subject_hash_old value appended with .0.
Use openssl to convert DER to PEM, then output the subject_hash_old and rename the file:
openssl x509 -inform DER -in cacert.der -out cacert.pemopenssl x509 -inform PEM -subject_hash_old -in cacert.pem

Now rename the cacert.pem file with <hash>.0

Copy the certificate to the device We can use adb to copy the certificate over, but since it has to be copied to the /system filesystem, we have to remount it as writable. As root, this is easy with adb remount.
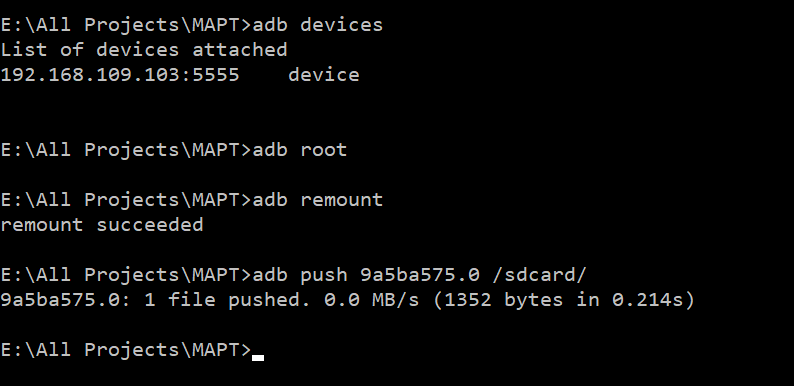
Then just drop into a shell (adb shell) and move the file to /system/etc/security/cacerts and chmod it to 644:

Lastly, we have to full reboot the device with either adb reboot or a power cycle.
VD Proxy to Burp Suite Configuration
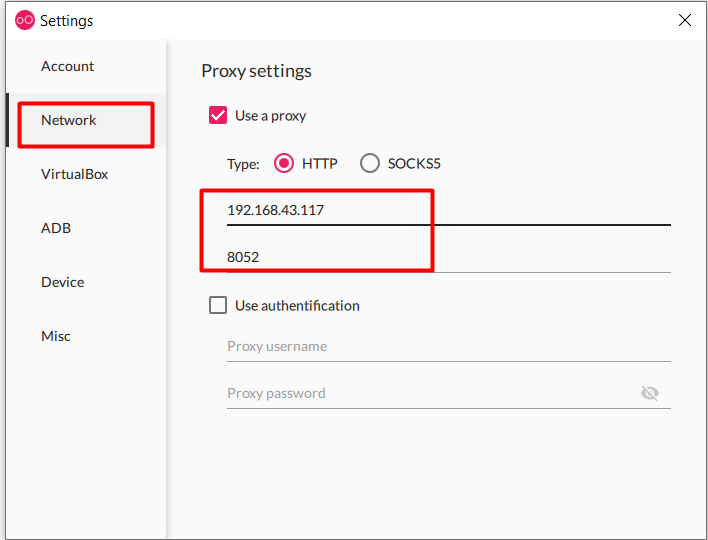
First know your machine IP and add it your Burp Proxy with a port you wish

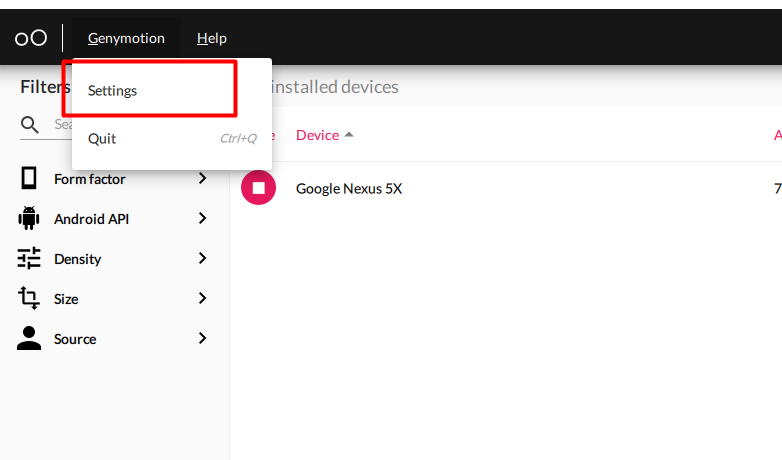
Now go to settings menu of Genymotion
In the network settings enter the IP port of Burp Suite proxy
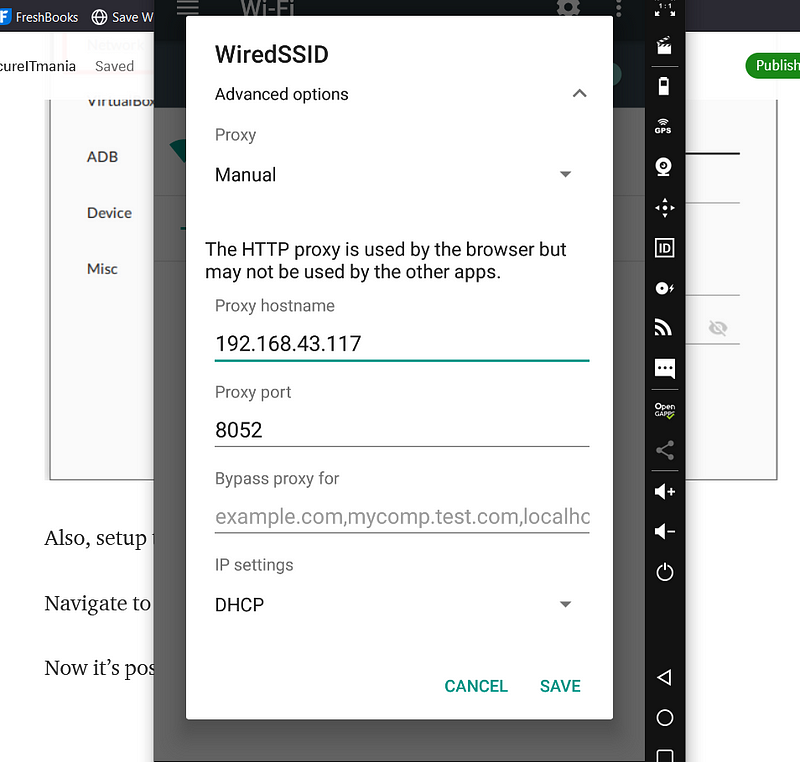
Also, setup the same proxy configuration on the Virtual Device.
Navigate to setting → WIFI → Long press on the “WiredSSID” → Click on “Modify network”
Enter the IP port of Burp Suite proxy and Save it
Now it’s possible to set up the proxy all app traffic with Burp Suite.
Thanks for reading. If you like this write-up please do follow me and stay tune for more hacking techniques using Inspeckage and view my profile to learn lot more secrets.
Follow me on Instagram, Twitter for BugBountytips, infosec information
 An unknown Linux secret that turned SSRF to OS Command injection.