
A better way to take control of your online privacy
Productivity Tip

Internet Privacy
Day to day the technology is growing rapidly. In this technological world, we are becoming the products of giant companies. We are monitored by these giant companies while we are surfing the internet. Using our search content stats on multiple platforms and combined them with ML technology they are influencing to buy some products. Indeed these recommendations are may useful but sometimes some recommendations are very annoying.
You may be annoyed by weird video recommendations every time you open your YouTube app on your phone. Typically, these suggestions suddenly pop up according to your recent interactions. Also, we are all interested to use public WIFI at a coffee shop or any other place. This is the easiest way to get hacked by a malevolent.
This is why we need to use a VPN to secure our internet surfing privacy. There lot of free and paid VPN service providers. But we don’t trust them completely, they may collect our data and even sell data. Basically, we don’t have full control over these VPN apps, also connection speed sucks as they are shared VPN connections. That’s why I deployed my own VPN on the cloud and it is easy and cheap rather than use a VPN application subscription.
Why Linode
I use many cloud services AWS, GCP, DigitalOcean but I feel that installing a VPN on Linode is straightforward as compared to other’s cloud platforms. Even a non-technical person also can deploy a VPN service within a few minutes.
Process to deploy our own VPN
1. Create an account in Linode ( I recommend you use any public referral link and you can get a $100 credit amount to your account)
2. Login into the Linode account
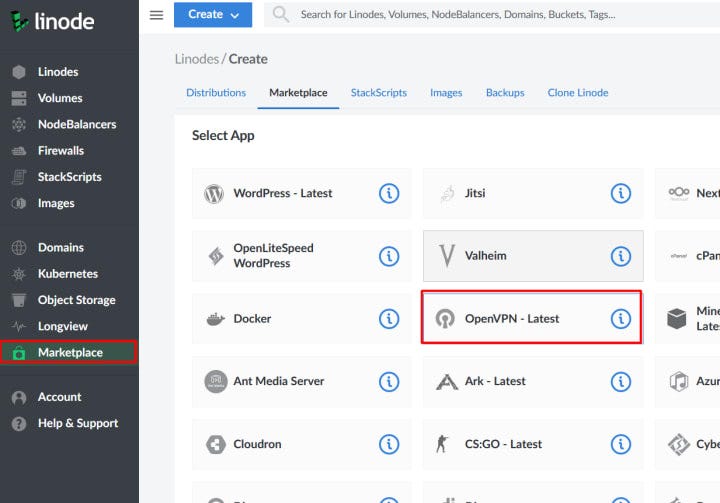
3. Navigate to the Marketplace and select “OpenVPN — Latest”
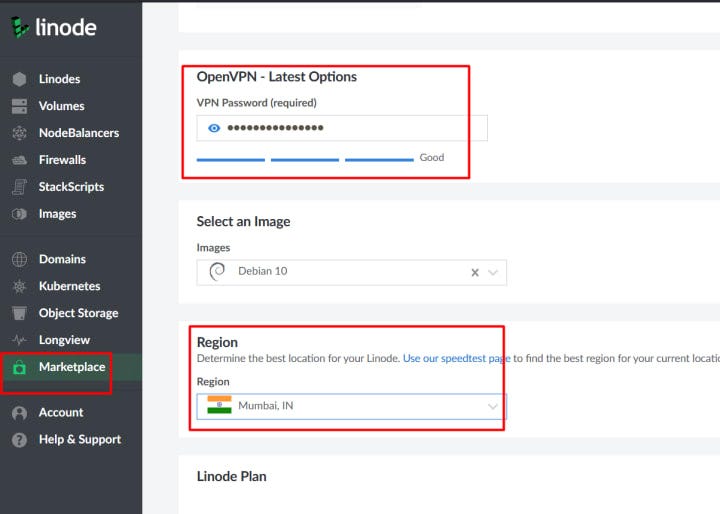
4. Scroll down and choose a strong password of your choice and choose a region.
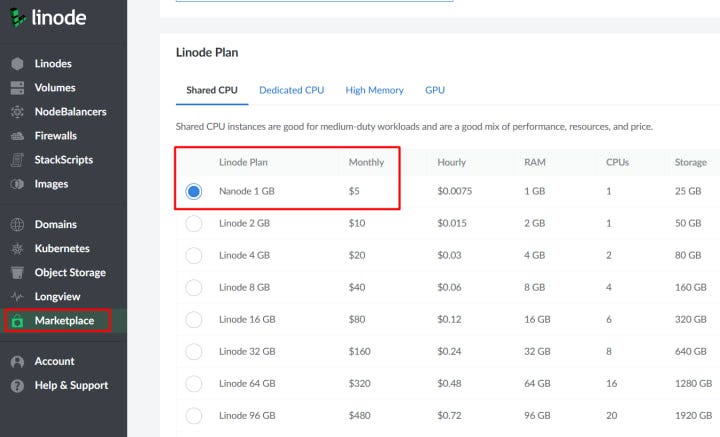
5. Now scroll down a little and you will find “Linode Plan” in that choose the “Nanode 1GB 5$” plan. ( You may choose 10$ it depends on your usage )
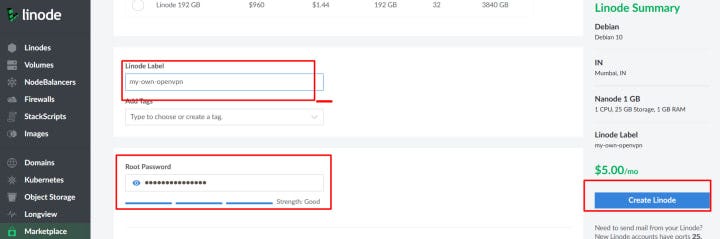
6. Now scroll a little and name the Linode Label as you want and choose a root password and then click “Create Linode”
7. After you click on the create button it will redirect to the Linode dashboard to show your Linode machine details. After a few seconds, it will show the status as “RUNNING”

8. Now copy your instance IP address from the IP Addresses table
9. In the new tab type **https://
10. Now you will get a nice login dashboard like shown in below
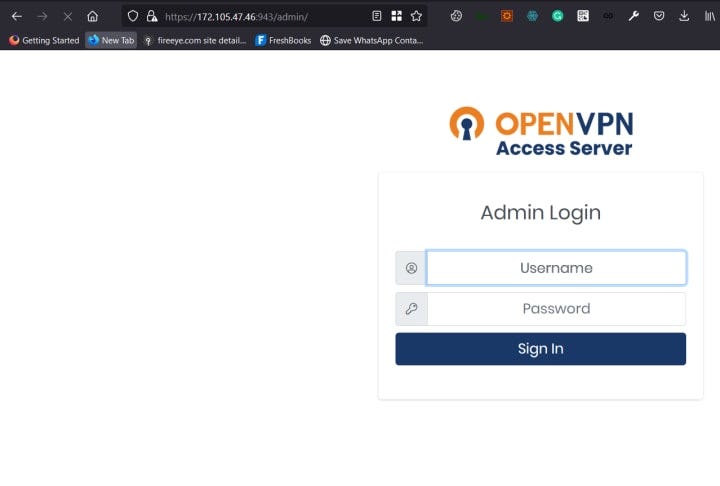
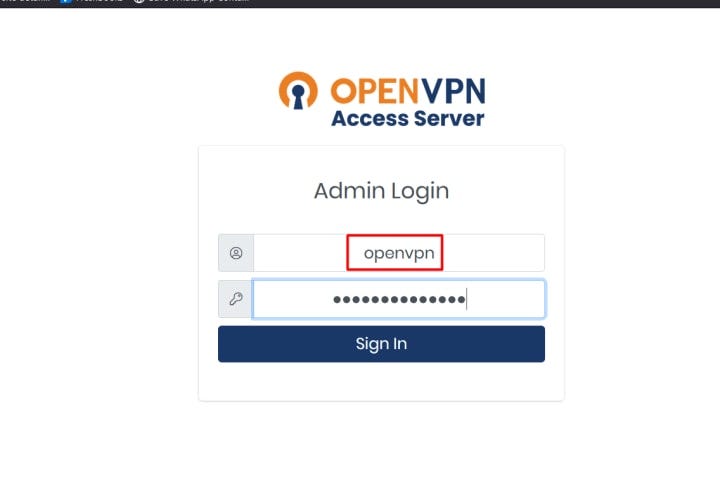
11. Now login into the application username as “openvpn” and using your password ( not the root password) and click on “Sign In”
12. Click on the “Agree” button
13. With the OpenVPN dashboard, you can access and control your OpenVPN
14. Now navigate to “User Management” click on the User Permissions
15. Now create a new user, choose your username, and check “Allow Auto-login” then choose your “Local Password”
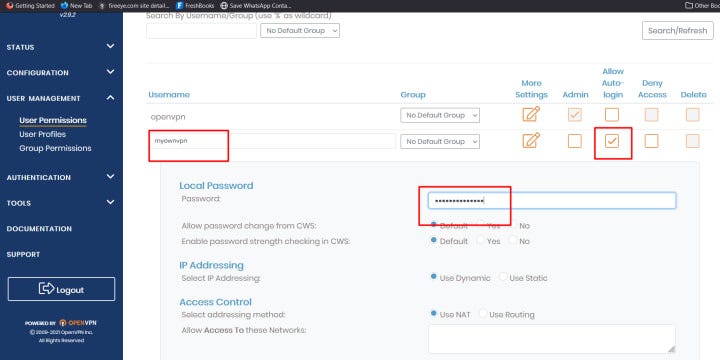
16. Click on the “Save Setting” button and logout from the Dashboard
17. Now the address bar now navigate to the address **https://
18. Now login with the newly created user credentials

19. Now download your auto-login profile OVPN file from the Profile section.
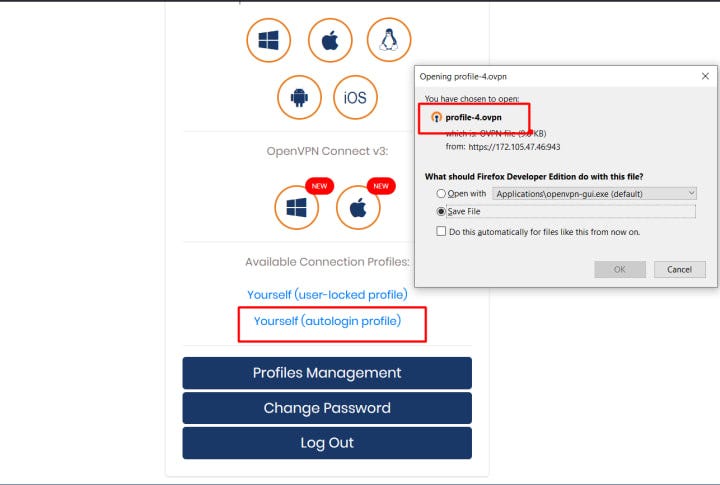
20. Now install OpenVPN on your device and import the downloaded “.ovpn” file.
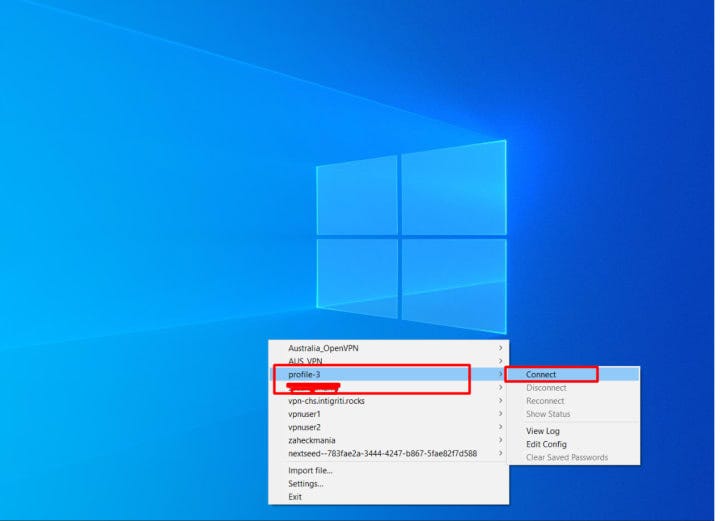
21. Now connect to your own VPN
Similarly, you can connect from a mobile device using the OpenVPN application
After you connect to the VPN, your IP will change

Thanks for reading. If you like this write-up please do follow me and stay tune for more hacking techniques. and view my profile to read interesting BugBounty write-ups.
 Genymotion-Xposed-Inspeckage-Setup.